> For the complete documentation index, see [llms.txt](https://docs.akto.io/llms.txt). Markdown versions of documentation pages are available by appending `.md` to page URLs; this page is available as [Markdown](https://docs.akto.io/integrations/jira.md).
# Jira
Integrate Akto with Jira to streamline your API security workflow by creating tickets for vulnerabilities directly from Akto.
## Benefits
* Instantly create Jira tickets for API vulnerabilities.
* Manage multiple Jira projects from a single integration.
* Enable **bi-directional sync** to ensure full alignment between Akto and Jira.
* Maintain a centralized view of security issues.
* Enhance collaboration between security and development teams.
## Quick Setup Steps
{% stepper %}
{% step %}
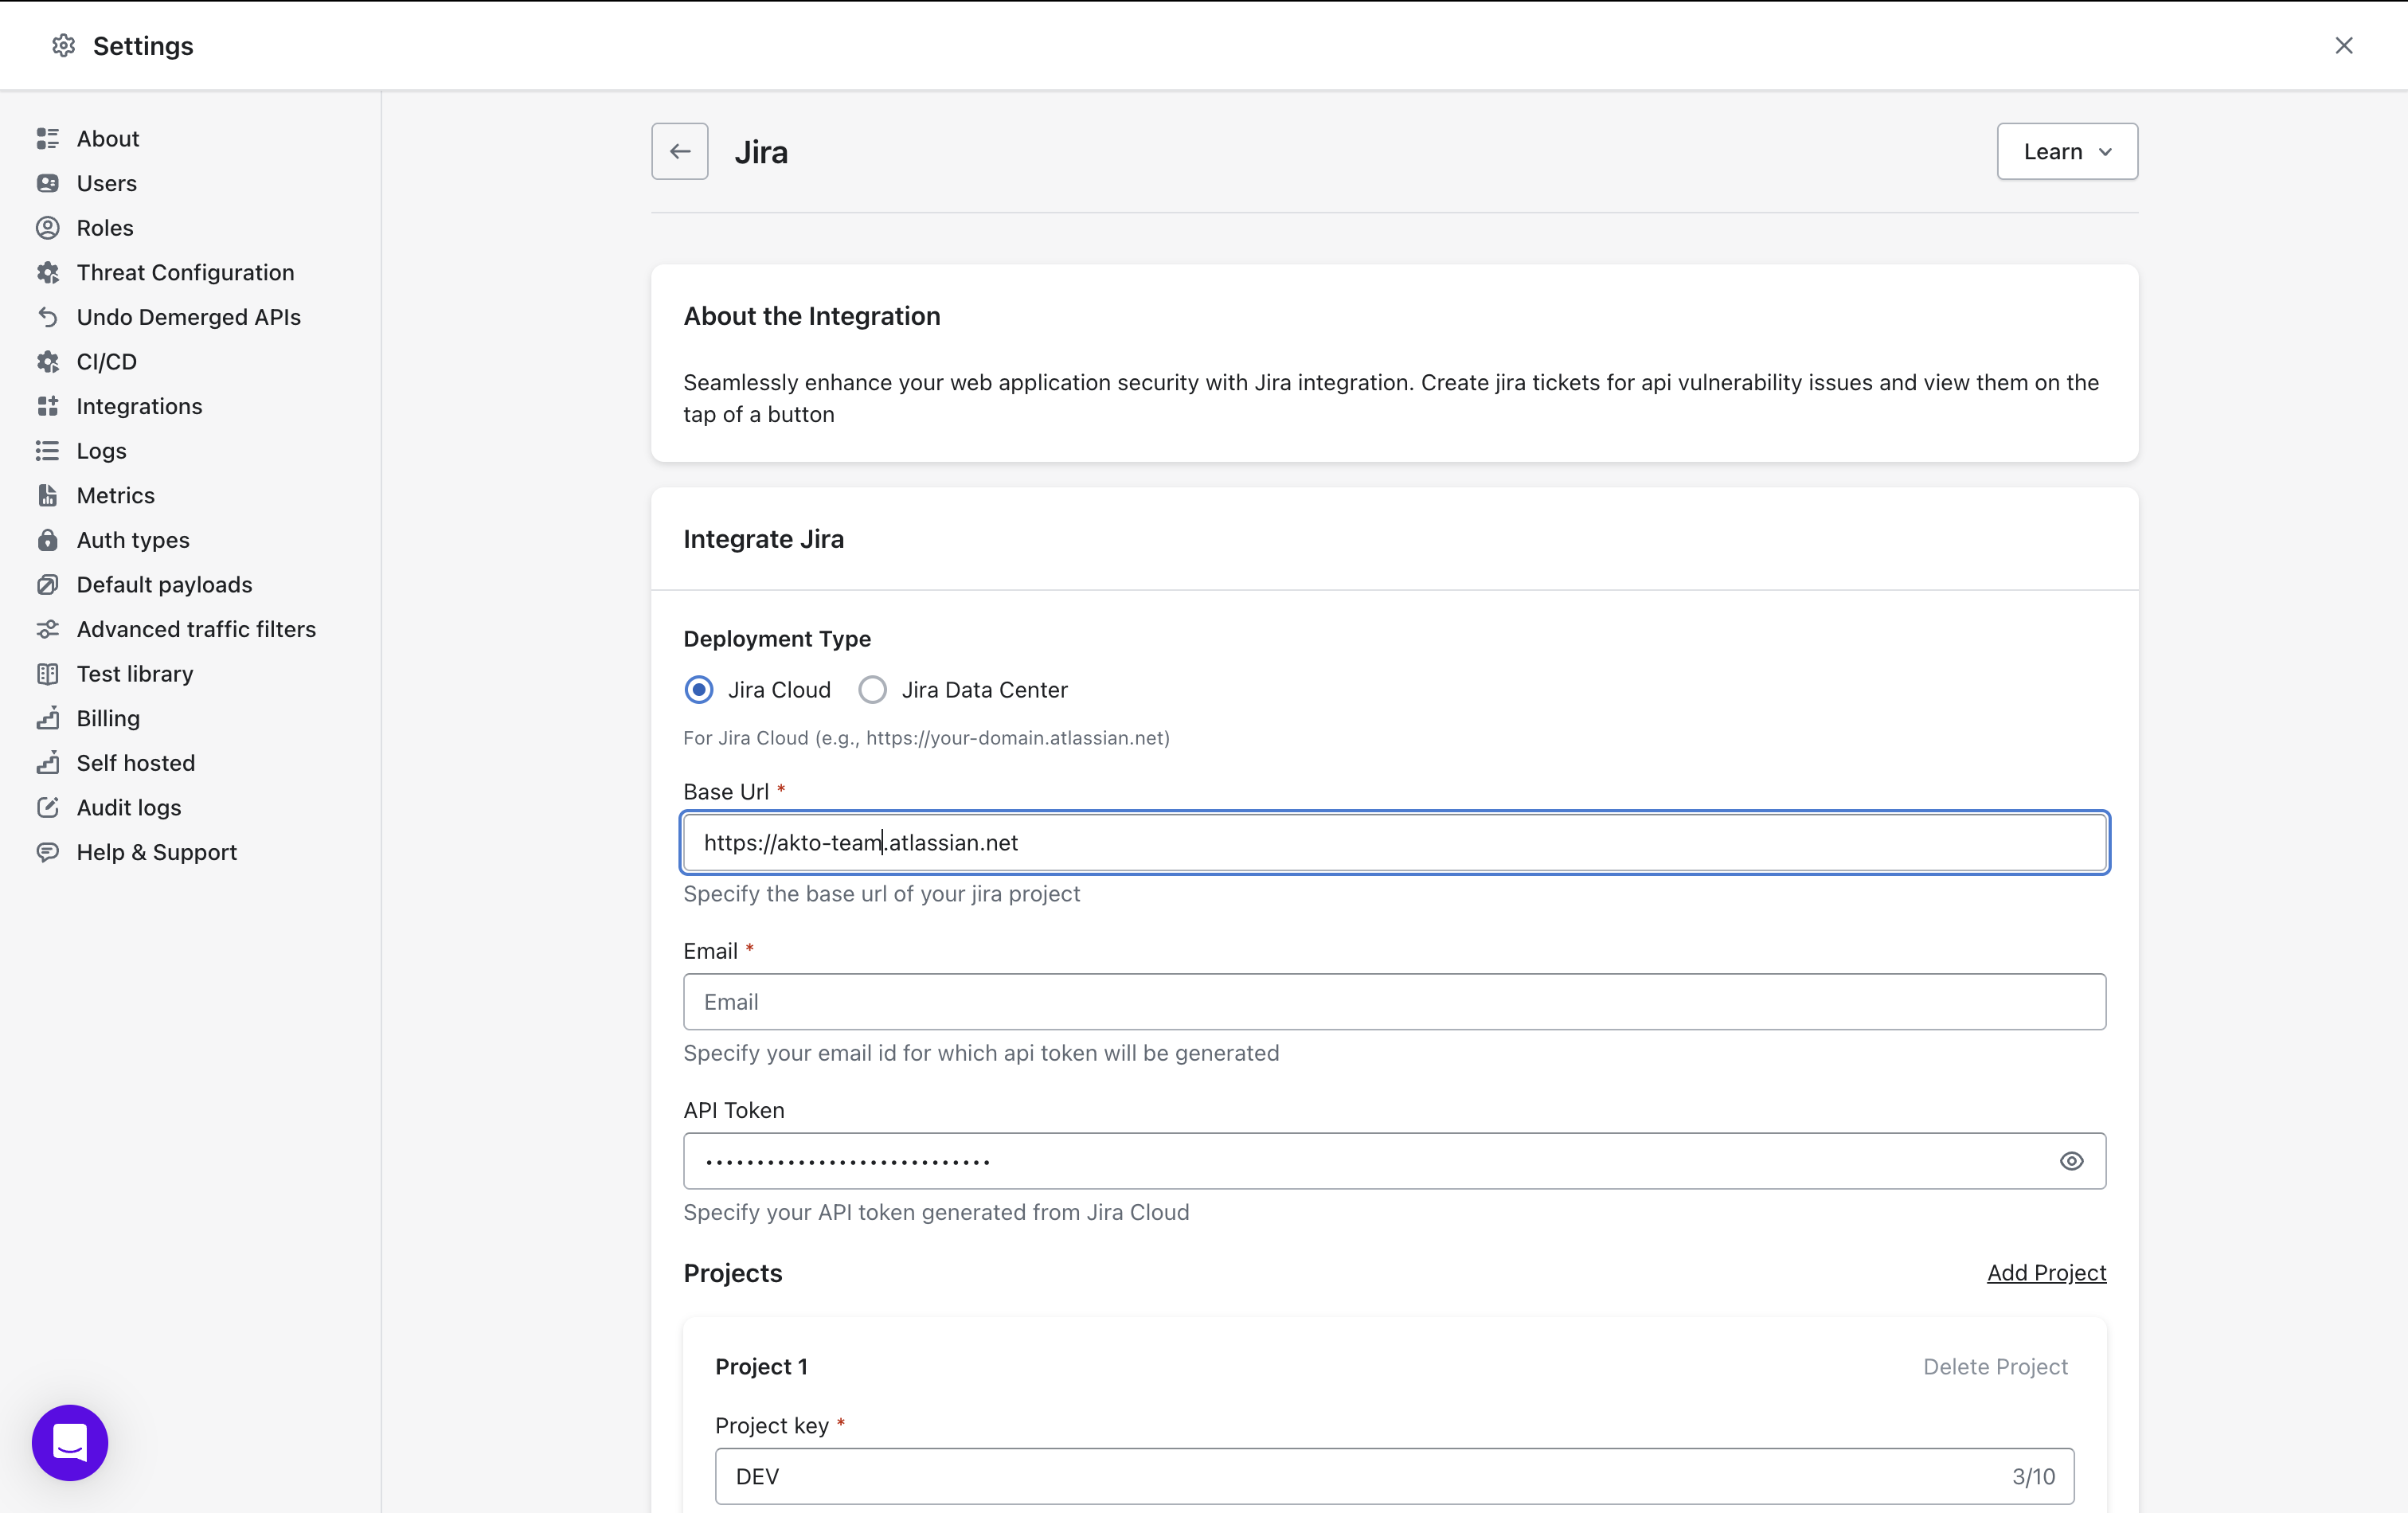
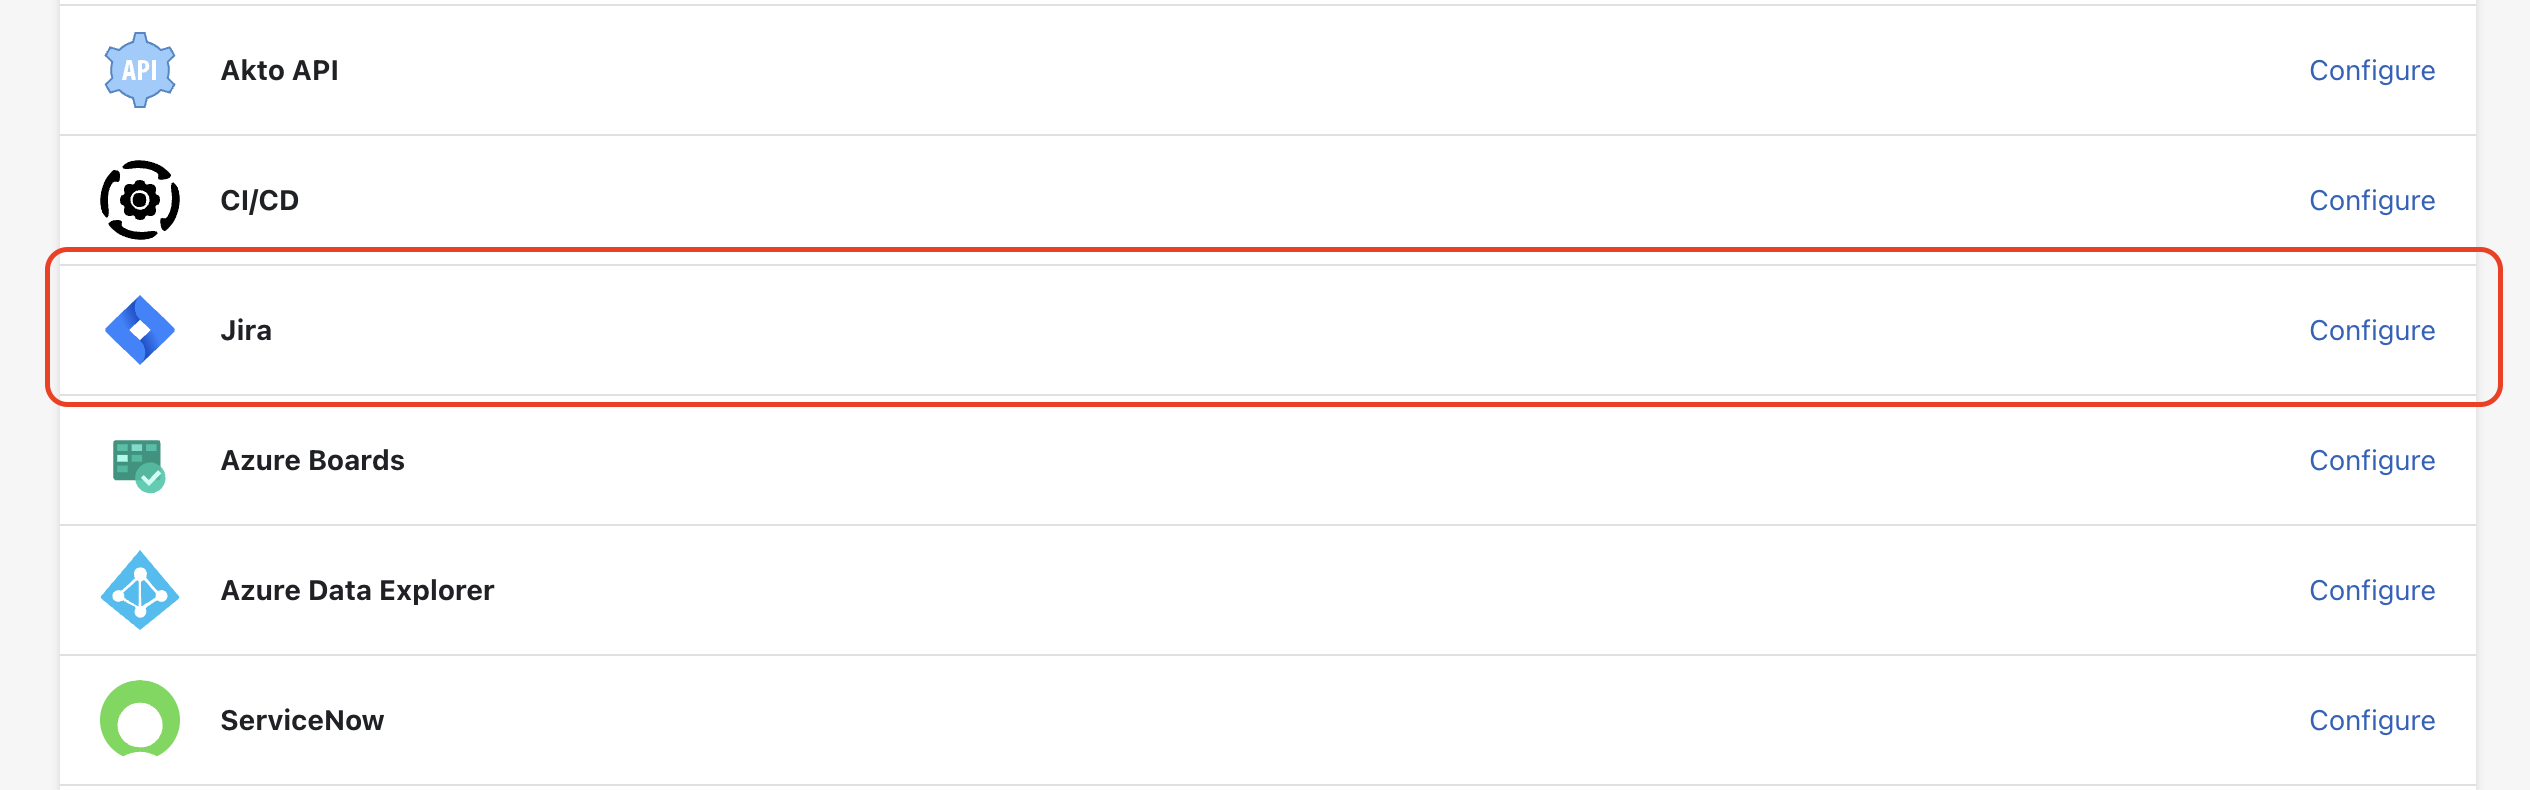
**Access Integrations**
* Go to **Settings > Integrations**.
* Find and click **"Configure"** next to Jira.
{% endstep %}
{% step %}
**Enter Jira Details**
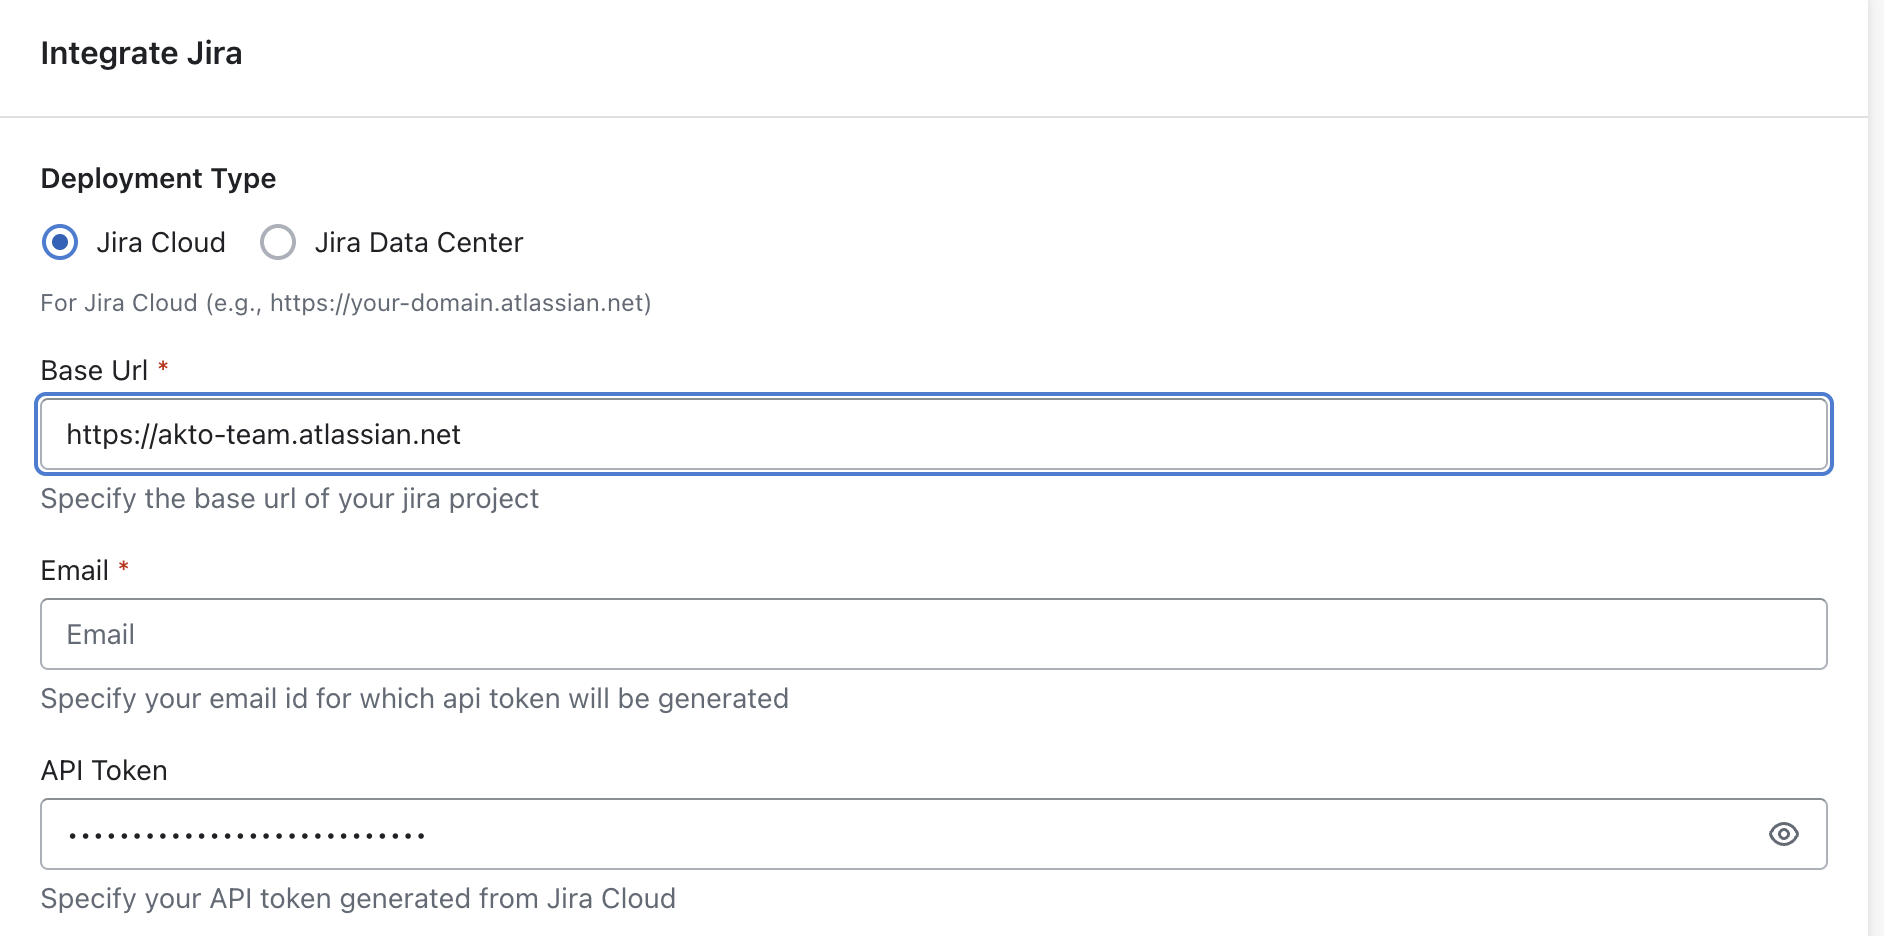
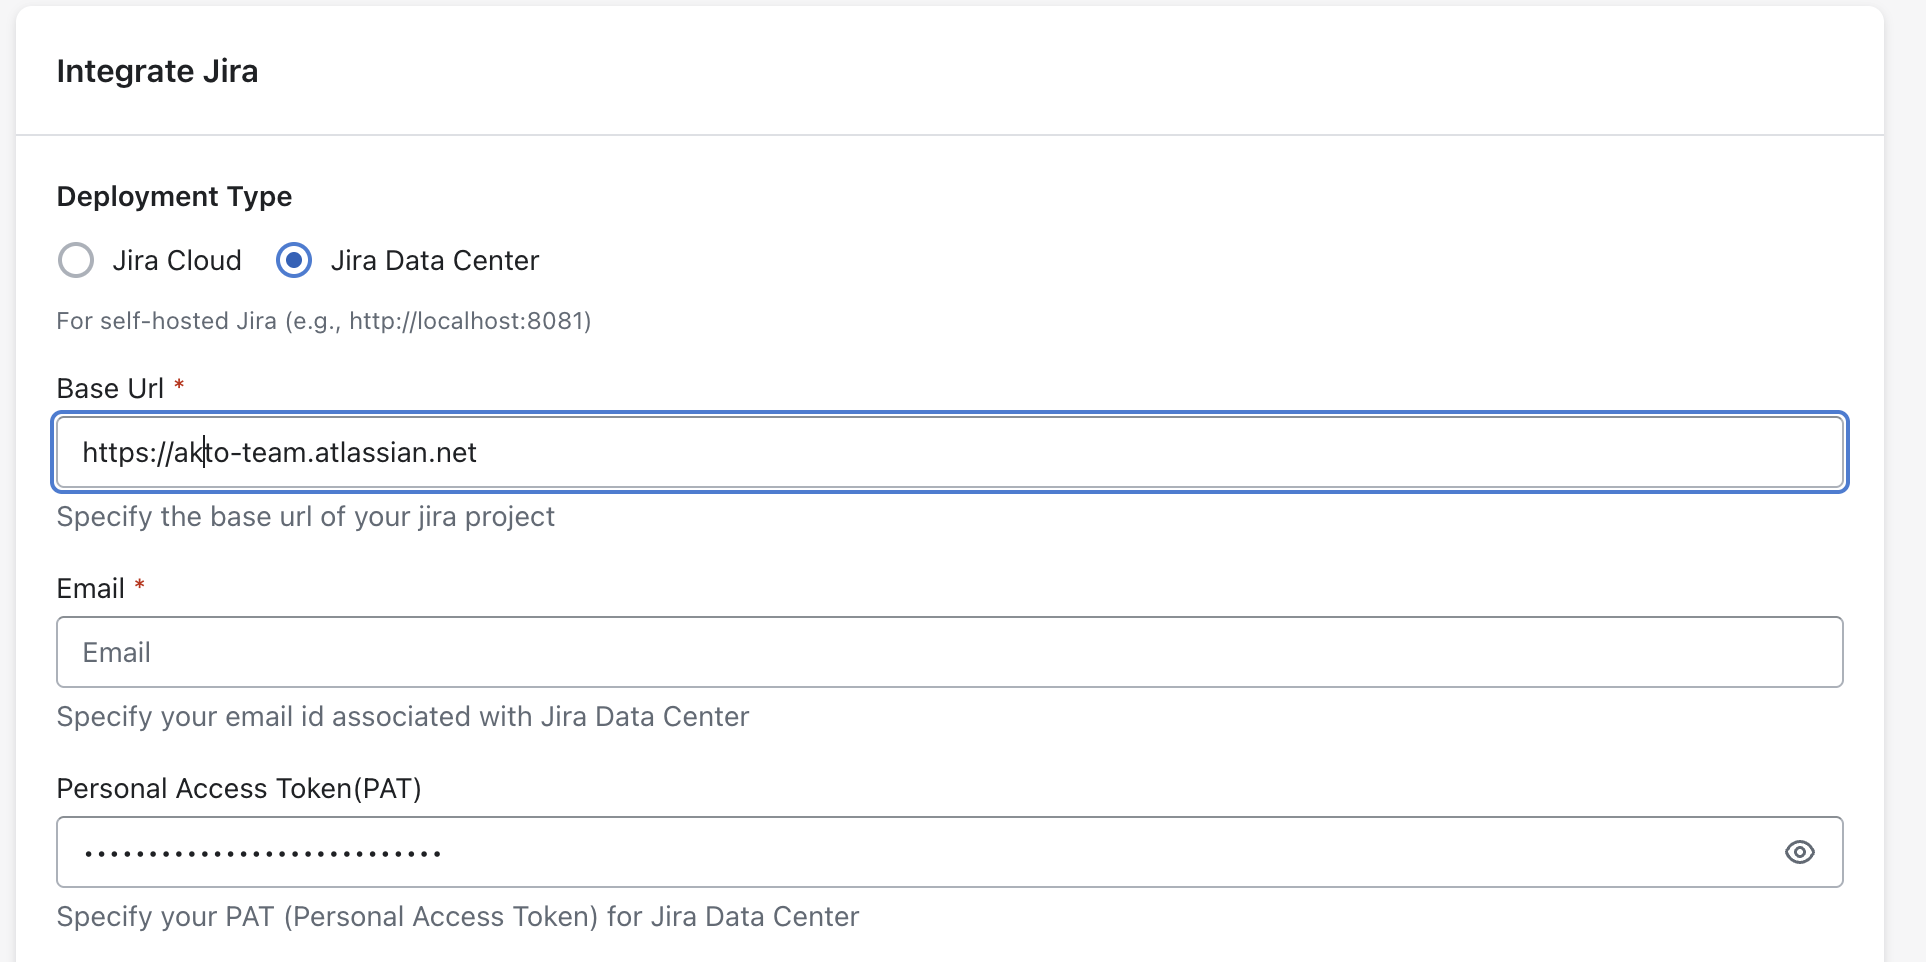
Akto supports integration with both **Jira Cloud** and **Jira Data Center**.
1. Select the **Jira Deployment Type**:
1. **Jira Cloud**
2. **Jira Data Center**
2. Based on the selected deployment type, enter the required details:
1. **Jira Cloud**
1. **Base URL** – Your Jira Cloud instance URL
2. **Email** – Email associated with your Jira account
3. **API Token** – Jira Cloud API token for authentication
2. **Jira Data Center**
1. **Base URL** – Your Jira Data Center instance URL
2. **Email** – Email associated with your Jira account
3. **Personal Access Token (PAT)** – Token used for Jira Data Center authentication
{% endstep %}
{% step %}
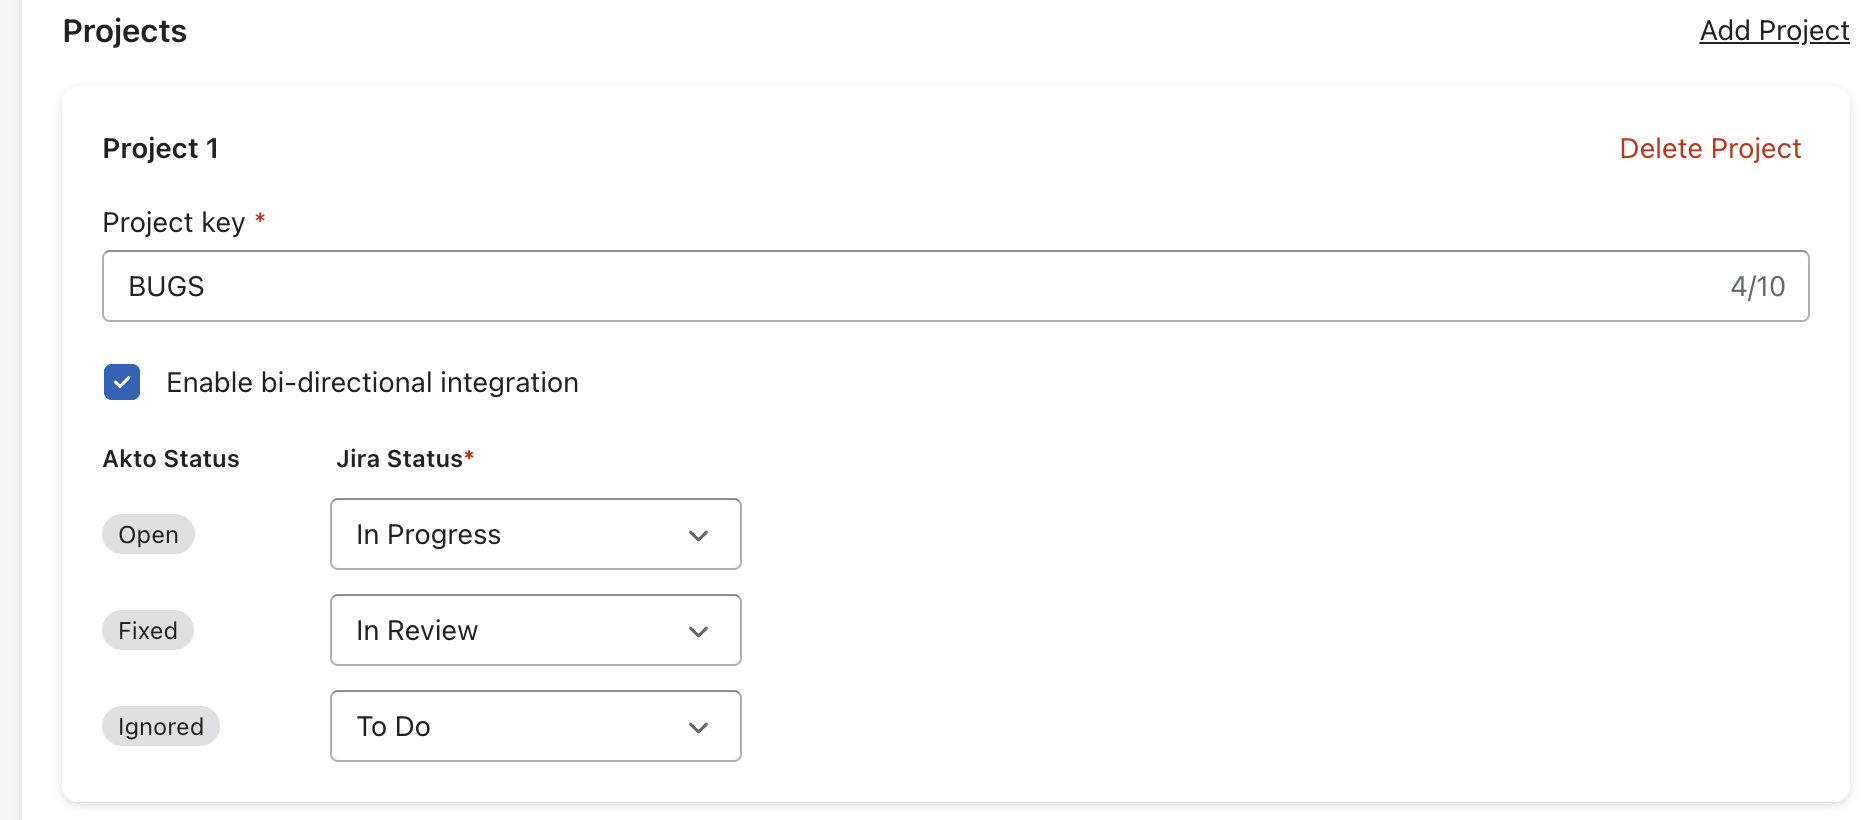
**Add Projects**
You can configure **one or multiple Jira projects**. For each project:
* **Project Key:** Enter your Jira project key (e.g., `KAN`, `DP`).
* **Enable Bi-Directional Integration (Optional):**
* Tick the checkbox to **sync status both ways**: when Akto updates a vulnerability’s status, Jira is updated; and vice versa.
* **Map statuses**: Define how Jira statuses map to Akto statuses:
* Akto Status: **Open** → Jira Status: *Select corresponding status*.
* Akto Status: **Fixed** → Jira Status: *Select corresponding status*.
* Akto Status: **Ignored** → Jira Status: *Select corresponding status*.
{% hint style="info" %}
💡 **You can add up to 10 projects per integration.**
{% endhint %}
{% endstep %}
{% step %}
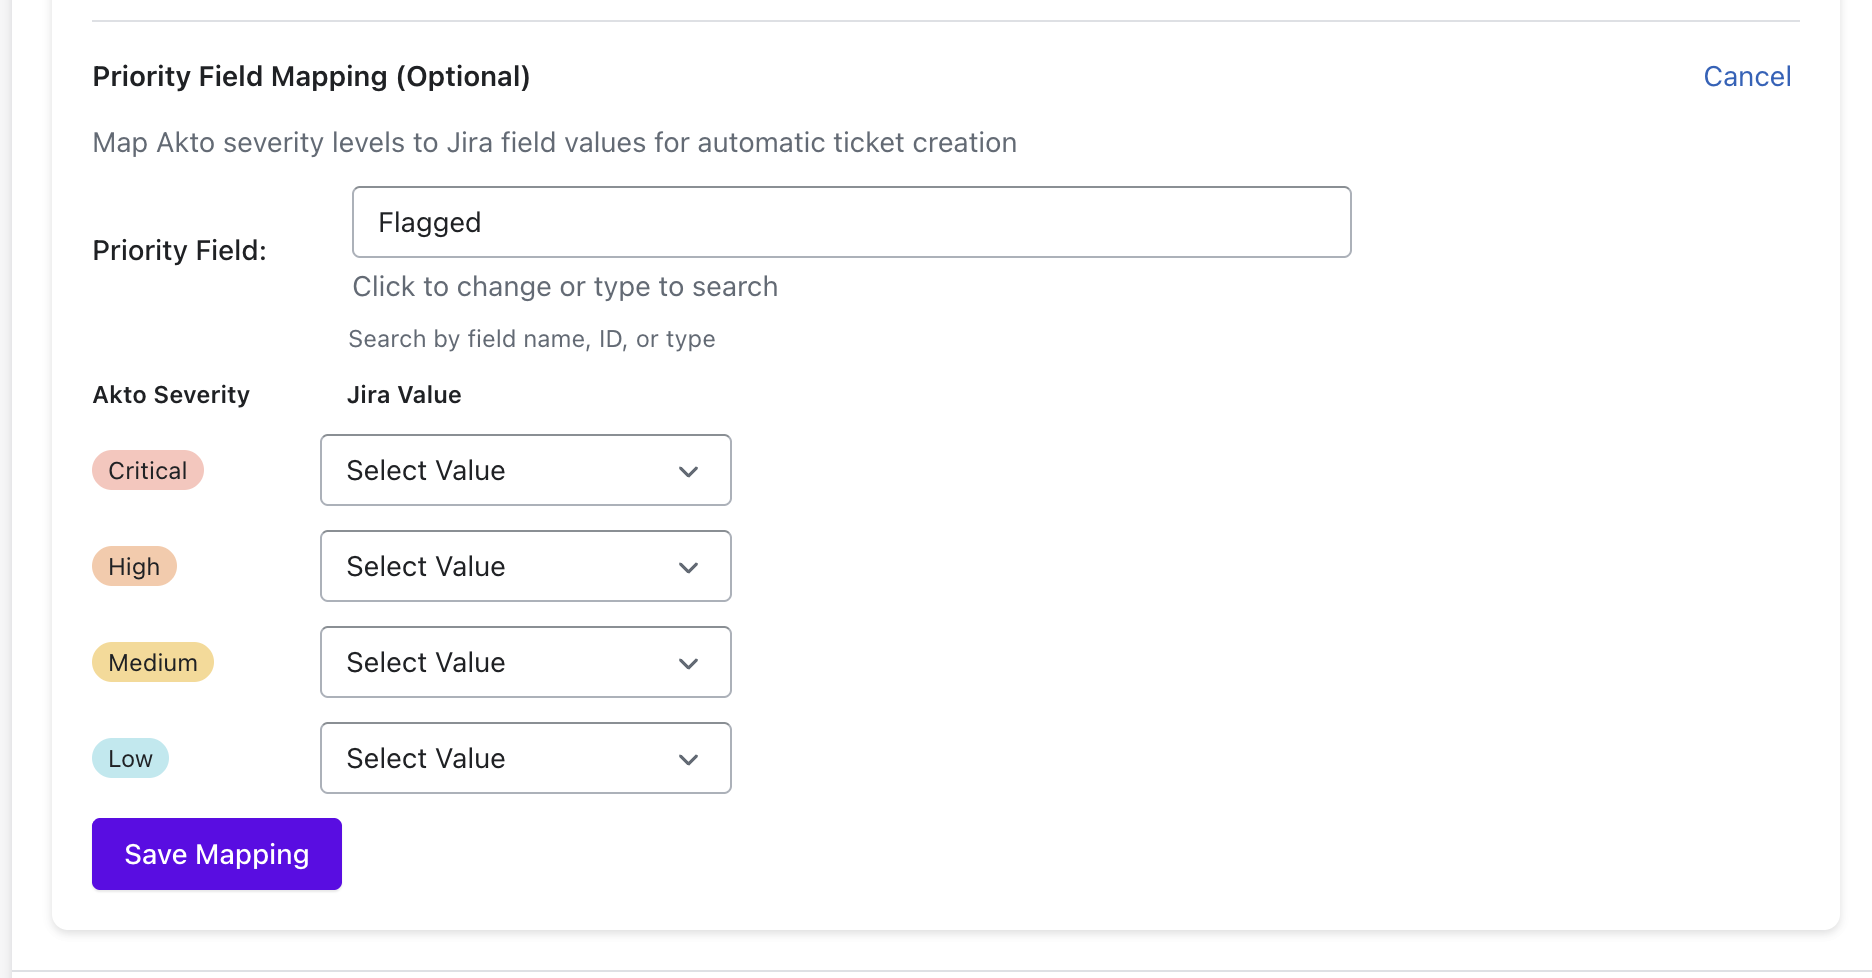
**Priority Field Selection**
Akto allows you to map its vulnerability severity levels to Jira field values for automatic ticket creation.
1. Select the **Priority Field** to which Akto severities should be mapped.\
You can choose Jira’s default **Priority** field or any supported **custom dropdown field** by searching using the field name, ID, or type.
2. Map each **Akto Severity** level (`Critical`, `High`, `Medium`, `Low`) to the corresponding value available in the selected Jira field.
3. Click **Save Mapping** to apply the configuration.
{% hint style="warning" %}
The selected field must be a **select / dropdown field** in Jira for severity mapping to work correctly.
{% endhint %}
{% endstep %}
{% step %}
**Save Configuration**
* Click **"Save"** to finalise.
{% endstep %}
{% endstepper %}
## What Happens When You Enable/Disable Bi-Directional Integration?
### **Enabling Bi-Directional Integration**
* Once enabled for a project, Akto will **start syncing statuses every 1 hour**.
* Any status change that occurs in Jira during that hour will be **detected in the next sync cycle** and updated in Akto according to your configured mapping.
* **Existing issues** will **retain their current status** in Akto unless they are updated in Jira.
* As soon as a status change is detected in Jira (for linked tickets), Akto will **sync the new status to match the mapping you configured**.
### **Disabling Bi-Directional Integration**
* When disabled, Akto will **stop syncing status updates** from Jira for that project.
* **Existing issues** in Akto will remain unchanged and **retain their last synced status** at the time of disabling.
* **Manual status updates** in Akto will no longer reflect back in Jira, and vice versa.
* ✅ **If Bi-Directional Integration is turned ON again**, Akto will **resume syncing all issue statuses that changed after the last successful sync (before turning OFF)**, ensuring no updates are missed.
{% hint style="warning" %}
This feature assumes that **no separate custom workflows** are created in your Jira app. If there are any, the syncing process **might be affected** and could lead to unexpected behavior. Please review your Jira workflows to ensure compatibility.
{% endhint %}
{% hint style="info" %}
**Important Notes**
* ⚠️ **Mandatory fields** set in Jira are not currently supported in this integration. Ensure that all required fields are included and properly configured in Jira to ensure smooth ticket creation.
* You can configure **different bi-directional settings per project** to tailor the sync behavior to each project’s needs.
* Always double-check your status mappings before enabling or modifying bi-directional settings.
* The bi-directional sync runs once every hour. Each run only processes issues that were updated after the previous sync.
* A Jira ticket can only move to a new status if that transition is allowed. If it’s not, the status will remain unchanged.
* If an error occurs while updating an issue, it is logged and skipped. That issue will not be retried in the next sync.
* If the sync job doesn’t run for some time (e.g., 6 hours due to a technical issue), the next successful run will pick up all updates made since the last successful sync.
{% endhint %}
## Get Support for your Akto setup
There are multiple ways to request support from Akto. We are 24X7 available on the following:
1. In-app `intercom` support. Message us with your query on intercom in Akto dashboard and someone will reply.
2. Join our [discord channel](https://www.akto.io/community) for community support.
3. Contact `help@akto.io` for email support.
4. Contact us [here](https://www.akto.io/contact-us).